
Contents
How to open a Binance Futures account
How to fund your Binance Futures account
Binance Futures Interface Guide
How to adjust your lever
What is the difference between the Marker Price and the Last Price?
What order types are available and when to use them?
How to use the Binance Futures Calculator
How to use Cover mode
What is the financing rate and how to consult it?
What is a Post-only, Time in Force and Reduce-Only order?
When are your positions at risk of being liquidated?
What is automatic leverage lowering, and how can it affect you?
To conclude
How to open a Binance Futures account
Before opening a Binance Futures account, you need a standard Binance account. If you don't have one, you can go to Binance and click Register in the upper right corner of your screen. Then follow the following steps:
Enter your email address and create a secure password. If you have a Referral ID, paste it into the Referral ID box. If you don't have one, you can use ourreferral link to receive a 10% discount on spot/margin trading fees.

When you're ready, click Create Account.
You will receive a verification email shortly. Follow the instructions in the email to complete your registration.
Next, log in to your Binance account, move your mouse to the bar at the top of the page, and click on USD(S)-M Futures.

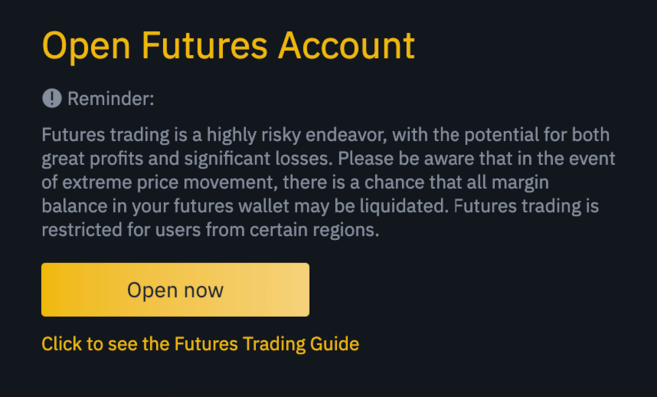
Click the Open Now button to activate your Binance Futures account. That's all. You are ready to trade!
If you are new to futures trading, we recommend reading the articles What Are Futures? and What are perpetual futures contracts? before you start trading.
You can also check out the Binance Futures FAQ to get an overview of the contract specifications.
If you want to test the platform without risks, you can try the Binance Futures testnet.
How to fund your Binance Futures account
You can transfer funds between your Exchange wallet (the wallet you use on Binance) and your Futures wallet (the wallet you use on Binance futures).
If you have not deposited funds to Binance, we recommend reading the How to Deposit Funds to Binance article.
To transfer funds to your Futures wallet, click on the Transfer option located on the right side of the Binance Futures page.

Set the amount you want to transfer and click Confirm Transfer. You should be able to see the balance added to your Futures portfolio very quickly. You can change the transfer direction using the double arrow icon as shown below.

This is not the only way to fund your Futures portfolio. You can also use your exchange wallet funds as collateral and borrow USDT to trade futures from the Futures Wallet Balances page. So, you don't need to transfer funds directly to your Futures wallet. It will of course be necessary to repay the USDT you borrowed.

Binance Futures Interface Guide

1. In this area you will find links to other Binance pages, such as COIN-M Futures (quarterly contracts), API Access, Spot and Activities. Under the [Information] tab, you will find links to FAQ about futures, funding rate, index price and other market data.
On the right side of the top bar you can access your Binance account, this includes access to your dashboard. You can easily view your wallet balance and orders across the entire Binance ecosystem.
2. This is where you can:
Choose the contract by positioning the mouse pointer over the name of the current contract (BTCUSDT by default).
Check the benchmark price (it's important to keep an eye on it, knowing that liquidations happen based on the benchmark price).
Check the expected funding rate and the countdown to the next funding cycle.
View your current chart. You can switch between the original chart and the integrated TradingView chart. You will get a real-time display of the current order book depth by clicking [Depth].

View order book data in real time. You can adjust the order book resolution from the drop-down menu in the upper right corner of this area (0.01 by default).
View a live feed of trades executed on the platform.

When you see an arrow in the lower right corner of a module, it means you can move and resize that element. You can easily create your own personalized interface!

3. This is where you can monitor your trading activity. You can switch between tabs to check the current status of your positions and your previously opened and executed orders. You can also get a complete transaction history or for a specific period.
This is also where you can monitor your position in the Auto Leverage Decrease Queue under ADL (important, should be monitored during periods of high volatility).
4. This is where you can view your available assets, make deposits and purchase more cryptocurrencies. This is also where you can view information relating to the current contract and your positions. Be sure to keep an eye on your margin ratio to avoid liquidations.
By clicking Transfer, you can transfer funds between your Futures wallet and the rest of the Binance ecosystem.
5. This is the entry field for your order. See our detailed explanation of the order types available in more detail in this article. This is also where you can switch between cross margin and isolated margin. Adjust your leverage by clicking on your current leverage (20x by default).
How to adjust your lever
Binance Futures allows you to manually adjust the leverage for each contract. To choose the contract, go to the top left of the page and hover over the selected contract (BTCUSDT by default).
To adjust the leverage, go to the order entry field and click on the current leverage (20x by default). Specify the leverage by adjusting the slider or entering the desired leverage, then click [Confirm].
It should be noted that the larger the position size, the lower the usable leverage. Likewise, the smaller the position size, the more leverage you can use.
Please note that using higher leverage carries a higher risk of liquidation. Novice traders should carefully consider the amount of leverage they use.
What is the difference between the Marker Price and the Last Price?
In order to avoid unnecessary spikes and liquidations during periods of high volatility, Binance Futures uses the last price and benchmark price.
The latest price is easy to understand. This is the last price at which the contract was traded. In other words the last order in the transaction history defines the last price. It is used to calculate your realized G and P (gains and losses).
The benchmark price is designed to prevent market manipulation. It is calculated from a combination of funding data and a basket of price data from several spot exchanges. Your liquidation prices and unrealized G&P are calculated based on the benchmark price.
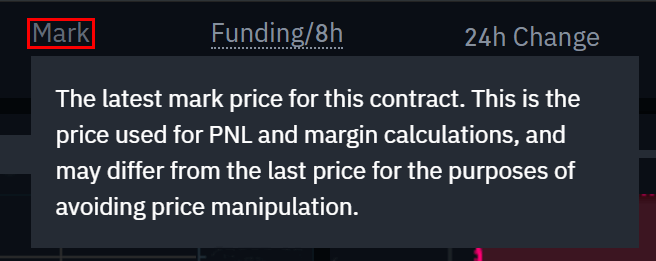
Please note that the benchmark price and the last price may differ.
When you choose an order type that uses a stop price as a trigger, you can select the price you want to use as a trigger: the last price or the benchmark price. To do this, select the price you want to use from the Trigger drop-down menu at the bottom of the order entry field.
What order types are available and when to use them?
There are many order types you can use on Binance Futures:
Order Limit
A Limit order is an order that you place in the order book with a specific Limit price. When you place a Limit order, it will only be executed if the market price reaches (or exceeds) the limit. Therefore, you can use Limit orders to buy at a lower price or to sell at a higher price than the current market price.
Order Market
A Market order is an order to buy or sell at the best price currently available. It is executed on one of the Limit orders previously placed in the order book. When you place a Market order, you will pay taker fees.
Order Stop-limit
The simplest way to understand a Stop-limit order is to break it down into stop prices and limit prices. The stop price is actually the price that will trigger the placement of a Limit order, and the limit price is the price that will be used to place the Limit order. This means that once your stop price is reached, your limit order will immediately be placed in the order book.
Although the Stop and Limit prices may be the same, this is not a requirement. In fact, it would be safer for you to set the Stop price (trigger price) a little higher than the Limit price for sell orders, or a little lower than the Limit price for buy orders. This increases the chances that your Limit order will be executed once the Stop price is reached.
Order Stop-market
Just like a Stop-limit order, a Stop market order uses a stop price as a trigger. Once the trigger price is reached, a Market order is created.
Order Take profit limit
If you understand what a Stop-limit order is, you will easily understand what a Take profit limit order is. Like a Stop-limit order, it involves a trigger price, the price that triggers the order, and a limit price, the price of the Limit order which is then added to the order book. The main difference between a Stop-limit order and a Take profit limit order is that the latter can only be used to reduce open positions.
A Take profit limit order can be a useful tool for managing risk and locking in profits at specified price levels. It can also be used in conjunction with other order types, such as Stop-limit orders, allowing you to have greater control over your positions.
Please note that these are not OCO orders. For example, if your Stop-limit order is reached when you have a Take profit limit order, the latter remains active if you do not cancel it manually.
You can set a Take profit limit order under the Stop Limit option in the order entry field.
Order take profit market
Just like a Take profit limit order, a Take profit market order uses a stop price as a trigger. However, once the trigger price is reached, a Market order is created.
You can set a Take profit market order under the Stop Market option in the order entry field.
Order Trailing stop
A Trailing stop order allows you to secure profits while limiting potential losses from your open positions. For a long position, this means that the trailing stop will increase with the price. But if the price decreases, the trailing stop does not go back down. If the price moves in the opposite direction by a certain percentage (called the recall rate), a sell order is placed. The opposite is true for a short position. The trailing stop follows the market down, but stops moving if the market rises. If the price moves in the opposite direction, a buy order is placed.
The activation price is the price that triggers the Trailing stop order. If you do not specify the activation price, it will default to the last price or the current benchmark price. You can set the price to use as a trigger at the bottom of the order entry field.
The callback rate is what determines the percentage difference between the Trailing order trigger and the market price. So, if you set the callback rate to 1%, the trailing stop will continue to follow the price at a distance of 1% if the market goes your way. If the price moves more than 1% in the opposite direction of your order, a buy or sell order is issued (depending on the direction of your order).
How to use the Binance Futures Calculator
Video tutorial available here.
You will find the calculator at the top of the order entry field. It allows you to calculate values before taking a long or short position. You can adjust the leverage slider in each tab to use it as a basis for your calculations.
The calculator has three tabs:
G&P - Use this tab to calculate your initial margin, profit and loss (G&P), and return on equity (ROE) based on the expected entry and exit price and position size.
Target Price – Use this tab to calculate at what price you will need to exit your position to achieve your desired percentage return.
Liquidation Price – Use this tab to calculate your estimated liquidation price based on your portfolio balance, expected entry price, and position size.
How to use Cover mode
In hedging mode, you can hold long and short positions at the same time for a single contract. But why would you want to do this? Let's say you are bullish on the price of Bitcoin for the longer term, so you have an open long position. At the same time, you can take quick short positions over shorter periods. Cover mode lets you do this. In this case, your quick short positions will not affect your long position.
The default position mode is Unidirectional mode. This means that you cannot hold long and short positions at the same time for a single contract. If you tried to do this, the positions would cancel each other out. So, if you want to use cover mode, you will have to enable it manually. Here's how to do it.
1. Go to the top right of your screen and select [Preferences].
2. Go to the [Position Mode] tab and select [Coverage Mode].
Please note that if you have open orders or positions, you will not be able to adjust your position mode.
What is the financing rate and how to consult it?
The funding rate helps ensure that the price of a perpetual futures contract remains as close as possible to the price of the underlying asset (spot). Essentially, traders pay each other based on their open positions. What determines which side is paid is determined by the difference between the perpetual futures price and the spot price.
When the funding rate is positive, long positions pay short ones. When the funding rate is negative, short positions pay long ones.
If you want to learn more about how this process works, check out What Are Perpetual Futures?.
What does this mean to you ? Depending on your open positions and funding rates, you will pay or receive payments. On Binance Futures, these funding payments are paid every 8 hours. You can check the time and estimated funding rate of the next funding period at the top of the page, next to the benchmark price.
If you want to check the previous financing rates for each contract, hover over [Information] and select [Funding Rate History].
What is a Post-only, Time in Force and Reduce-Only order?

When using Limit orders, you can set additional instructions along with your orders. On Binance Futures, these can be Post-Only or Time in Force (TIF) instructions, and they determine additional characteristics of your Limit orders. You can access it at the bottom of the order entry field.
Post-Only means that your order will always be added to the order book first and will never be executed against an existing order in the order book. This is useful if you only want to pay maker fees.
TIF instructions allow you to specify how long your orders will remain active before they are executed or expire. You can select one of the following options for TIF statements:
GTC (Good Till Cancel): the order will remain active until executed or canceled.
IOC (Immediate Or Cancel): the order will be executed immediately (in whole or in part). If it is only partially executed, the unexecuted part of the order will be canceled.
FOK (Fill Or Kill): The order must be fully executed immediately. Otherwise it won't run at all.
When in one-way mode, checking the "Reduce Only" box ensures that new orders you set will only decrease your currently open positions and never increase them.
When are your positions at risk of being liquidated?
Liquidation occurs when your margin balance drops below the required maintenance margin. Margin balance is the balance in your Binance Futures account, including your unrealized G and P (gains and losses). Thus, your gains and losses will cause a change in the value of the margin balance. If you use Cross Margin mode, this balance will be shared between all your positions. If you use Isolated Margin mode, this balance can be assigned to each position individually.
The maintenance margin is the minimum value you must have to keep your positions open. This varies depending on the size of your positions. Larger positions require higher maintenance margin.
You can check your current margin ratio in the bottom right corner. If your margin ratio reaches 100%, your positions will be liquidated.
When liquidation occurs, all your open orders are canceled. Ideally, you should keep track of your positions to avoid self-liquidation, which incurs additional fees. If your position is close to being liquidated, it may be beneficial to consider manually closing the position instead of waiting for self-liquidation.
What is automatic lever reduction and how can it affect you?
When a trader's account size is less than 0, the Insurance Fund is used to cover losses. However, in certain exceptionally volatile market environments, the Insurance Fund may be unable to offset losses and open positions must be reduced in order to cover them. This means that in times like this, your open positions are also likely to be reduced.
The order of these position reductions is determined by a queue, where the most profitable and leveraged traders are at the front of the queue. You can check your current position in the queue by hovering over [ADL] under the [Positions] tab.

To conclude
Futures contracts are derivative products that give traders an obligation to buy or sell an asset in the future. But unlike traditional futures contracts, perpetual futures contracts do not have a delivery date. Derivatives can be confusing for inexperienced traders. It is therefore essential to understand how these contracts work before taking any financial risk. As we mentioned, you can access the Binance Futures testnet to test the platform without risking any real funds.